Arduino With Makefiles For Linux Command Line Programmers
2022-04-25 - By Robert Elder
The purpose of this article is to supplement the video below that describes how to migrate a project out of the Arduino IDE and into a fully command-line environment. It is assumed that the reader wants to perform this task in a Linux environment with an Arduino project that can already be compiled in the Arduino IDE and flashed to their board. The solution described here will discuss how to completely migrate the project to use make files for building and flashing the project, and how to check the output from the Arduino on the command-line using 'minicom'.
Here is a version of the make file that was produced in the video:
SKETCH_NAME=sketch_apr23a

AVR_BIN=/usr/share/arduino/hardware/tools/avr/bin
AVR_HARDWARE=/usr/share/arduino/hardware/arduino
GPP_FLAGS=-c -g -Os -Wall -fno-exceptions -ffunction-sections -fdata-sections -mmcu=atmega328p -DF_CPU=16000000L -MMD -DUSB_VID=null -DUSB_PID=null -DARDUINO=105 -D__PROG_TYPES_COMPAT__ -I${AVR_HARDWARE}/cores/arduino -I${AVR_HARDWARE}/variants/eightanaloginputs
GCC_FLAGS=-c -g -Os -Wall -ffunction-sections -fdata-sections -mmcu=atmega328p -DF_CPU=16000000L -MMD -DUSB_VID=null -DUSB_PID=null -DARDUINO=105 -D__PROG_TYPES_COMPAT__ -I${AVR_HARDWARE}/cores/arduino -I${AVR_HARDWARE}/variants/eightanaloginputs
ARDUINO_CORE_SOURCE_DIR=${AVR_HARDWARE}/cores/arduino
ARDUINO_CC=${AVR_BIN}/avr-gcc
ARDUINO_CPP=${AVR_BIN}/avr-g++
ARDUINO_AR=${AVR_BIN}/avr-ar

OBJECT_FILES=$(SKETCH_NAME).o wiring.o wiring_pulse.o wiring_digital.o malloc.o realloc.o wiring_shift.o wiring_analog.o WInterrupts.o Stream.o HardwareSerial.o CDC.o WString.o Print.o new.o main.o WMath.o HID.o IPAddress.o USBCore.o Tone.o
D_FILES=$(OBJECT_FILES:.o=.d)

default: $(OBJECT_FILES)
	rm -f core.a
	$(ARDUINO_AR) rcs core.a wiring.o
	$(ARDUINO_AR) rcs core.a wiring_pulse.o
	$(ARDUINO_AR) rcs core.a wiring_digital.o
	$(ARDUINO_AR) rcs core.a malloc.o
	$(ARDUINO_AR) rcs core.a realloc.o
	$(ARDUINO_AR) rcs core.a wiring_shift.o
	$(ARDUINO_AR) rcs core.a wiring_analog.o
	$(ARDUINO_AR) rcs core.a WInterrupts.o
	$(ARDUINO_AR) rcs core.a Stream.o
	$(ARDUINO_AR) rcs core.a HardwareSerial.o
	$(ARDUINO_AR) rcs core.a CDC.o
	$(ARDUINO_AR) rcs core.a WString.o
	$(ARDUINO_AR) rcs core.a Print.o
	$(ARDUINO_AR) rcs core.a new.o
	$(ARDUINO_AR) rcs core.a main.o
	$(ARDUINO_AR) rcs core.a WMath.o
	$(ARDUINO_AR) rcs core.a HID.o
	$(ARDUINO_AR) rcs core.a IPAddress.o
	$(ARDUINO_AR) rcs core.a USBCore.o
	$(ARDUINO_AR) rcs core.a Tone.o
	$(AVR_BIN)/avr-gcc -Os -Wl,-Map,avr.map,--gc-sections -mmcu=atmega328p -o $(SKETCH_NAME).elf $(SKETCH_NAME).o core.a -L./ -lm
	$(AVR_BIN)/avr-objcopy -O ihex -j .eeprom --set-section-flags=.eeprom=alloc,load --no-change-warnings --change-section-lma .eeprom=0 $(SKETCH_NAME).elf $(SKETCH_NAME).eep
	/usr/share/arduino/hardware/tools/avr/bin/avr-objcopy -O ihex -R .eeprom $(SKETCH_NAME).elf $(SKETCH_NAME).hex
	/usr/share/arduino/hardware/tools/avrdude -C/usr/share/arduino/hardware/tools/avrdude.conf -v -v -v -v -patmega328p -carduino -P/dev/ttyUSB0 -b115200 -D -Uflash:w:$(SKETCH_NAME).hex:i

#  C sources:

wiring.o: $(ARDUINO_CORE_SOURCE_DIR)/wiring.c
	 $(ARDUINO_CC) $(GCC_FLAGS) $< -o $@

wiring_pulse.o: $(ARDUINO_CORE_SOURCE_DIR)/wiring_pulse.c
	 $(ARDUINO_CC) $(GCC_FLAGS) $< -o $@

wiring_digital.o: $(ARDUINO_CORE_SOURCE_DIR)/wiring_digital.c
	 $(ARDUINO_CC) $(GCC_FLAGS) $< -o $@

malloc.o: $(ARDUINO_CORE_SOURCE_DIR)/avr-libc/malloc.c
	 $(ARDUINO_CC) $(GCC_FLAGS) $< -o $@

realloc.o: $(ARDUINO_CORE_SOURCE_DIR)/avr-libc/realloc.c
	 $(ARDUINO_CC) $(GCC_FLAGS) $< -o $@

wiring_shift.o: $(ARDUINO_CORE_SOURCE_DIR)/wiring_shift.c
	 $(ARDUINO_CC) $(GCC_FLAGS) $< -o $@

wiring_analog.o: $(ARDUINO_CORE_SOURCE_DIR)/wiring_analog.c
	 $(ARDUINO_CC) $(GCC_FLAGS) $< -o $@

WInterrupts.o: $(ARDUINO_CORE_SOURCE_DIR)/WInterrupts.c
	 $(ARDUINO_CC) $(GCC_FLAGS) $< -o $@

#  C++ sources:

$(SKETCH_NAME).o: $(SKETCH_NAME).cpp
	 $(ARDUINO_CPP) $(GPP_FLAGS) $< -o $@

Stream.o: $(ARDUINO_CORE_SOURCE_DIR)/Stream.cpp
	 $(ARDUINO_CPP) $(GPP_FLAGS) $< -o $@

HardwareSerial.o: $(ARDUINO_CORE_SOURCE_DIR)/HardwareSerial.cpp
	 $(ARDUINO_CPP) $(GPP_FLAGS) $< -o $@

CDC.o: $(ARDUINO_CORE_SOURCE_DIR)/CDC.cpp
	 $(ARDUINO_CPP) $(GPP_FLAGS) $< -o $@

WString.o: $(ARDUINO_CORE_SOURCE_DIR)/WString.cpp
	 $(ARDUINO_CPP) $(GPP_FLAGS) $< -o $@

Print.o: $(ARDUINO_CORE_SOURCE_DIR)/Print.cpp
	 $(ARDUINO_CPP) $(GPP_FLAGS) $< -o $@

new.o: $(ARDUINO_CORE_SOURCE_DIR)/new.cpp
	 $(ARDUINO_CPP) $(GPP_FLAGS) $< -o $@

main.o: $(ARDUINO_CORE_SOURCE_DIR)/main.cpp
	 $(ARDUINO_CPP) $(GPP_FLAGS) $< -o $@

WMath.o: $(ARDUINO_CORE_SOURCE_DIR)/WMath.cpp
	 $(ARDUINO_CPP) $(GPP_FLAGS) $< -o $@

HID.o: $(ARDUINO_CORE_SOURCE_DIR)/HID.cpp
	 $(ARDUINO_CPP) $(GPP_FLAGS) $< -o $@

IPAddress.o: $(ARDUINO_CORE_SOURCE_DIR)/IPAddress.cpp
	 $(ARDUINO_CPP) $(GPP_FLAGS) $< -o $@

USBCore.o: $(ARDUINO_CORE_SOURCE_DIR)/USBCore.cpp
	 $(ARDUINO_CPP) $(GPP_FLAGS) $< -o $@

Tone.o: $(ARDUINO_CORE_SOURCE_DIR)/Tone.cpp
	 $(ARDUINO_CPP) $(GPP_FLAGS) $< -o $@

clean:
	rm -f *.o *.d core.a $(SKETCH_NAME).eep $(SKETCH_NAME).elf $(SKETCH_NAME).hex avr.map
This make file is not perfect, but it's a good starting point. If you decide to include additional Arduino libraries (such as 'Stepper.h') you may need to add extra build rules to the make file as described in the video.
Arduino Makefile From Scratch
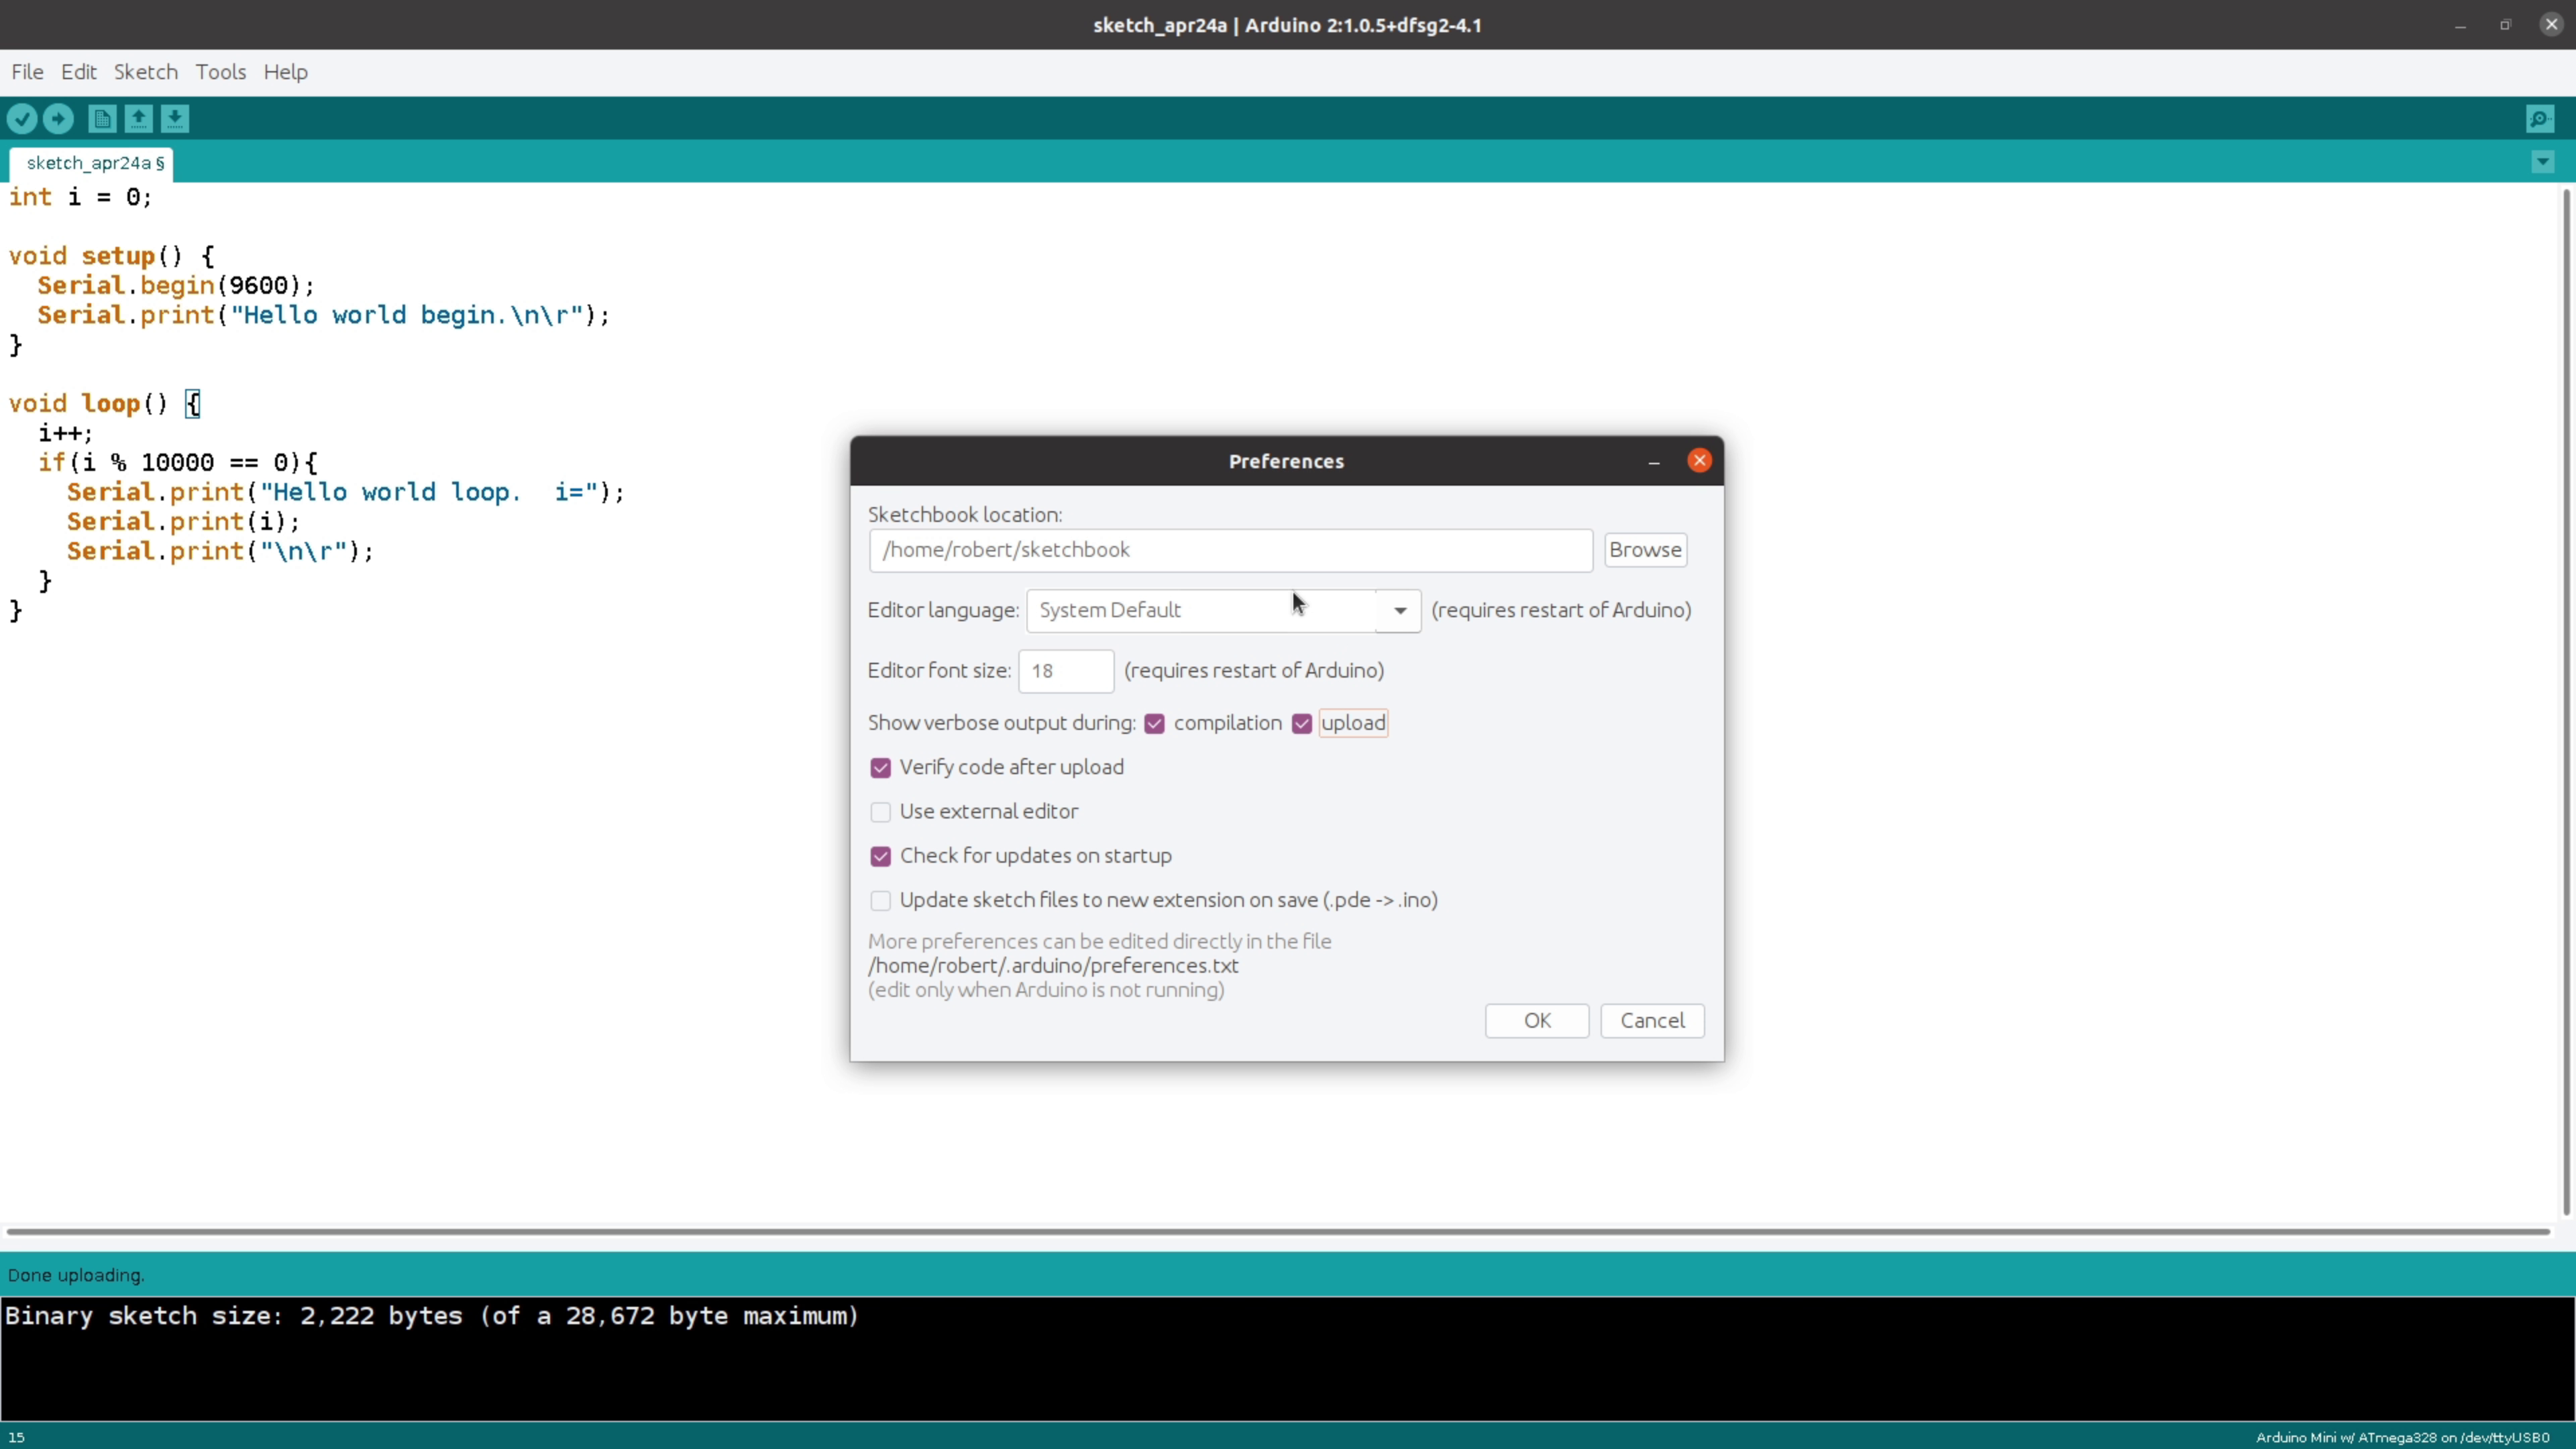
The process of building this make file started with the following C program in the Arduino IDE:
int i = 0;

void setup() {
  Serial.begin(9600);
  Serial.print("Hello world begin.\n\r");
}

void loop() {
  i++;
  if(i % 10000 == 0){
    Serial.print("Hello world loop.  i=");
    Serial.print(i);
    Serial.print("\n\r");
  }
}
The next step was to enable the verbose output for 'compilation' and 'upload' in the Arduino preferences:
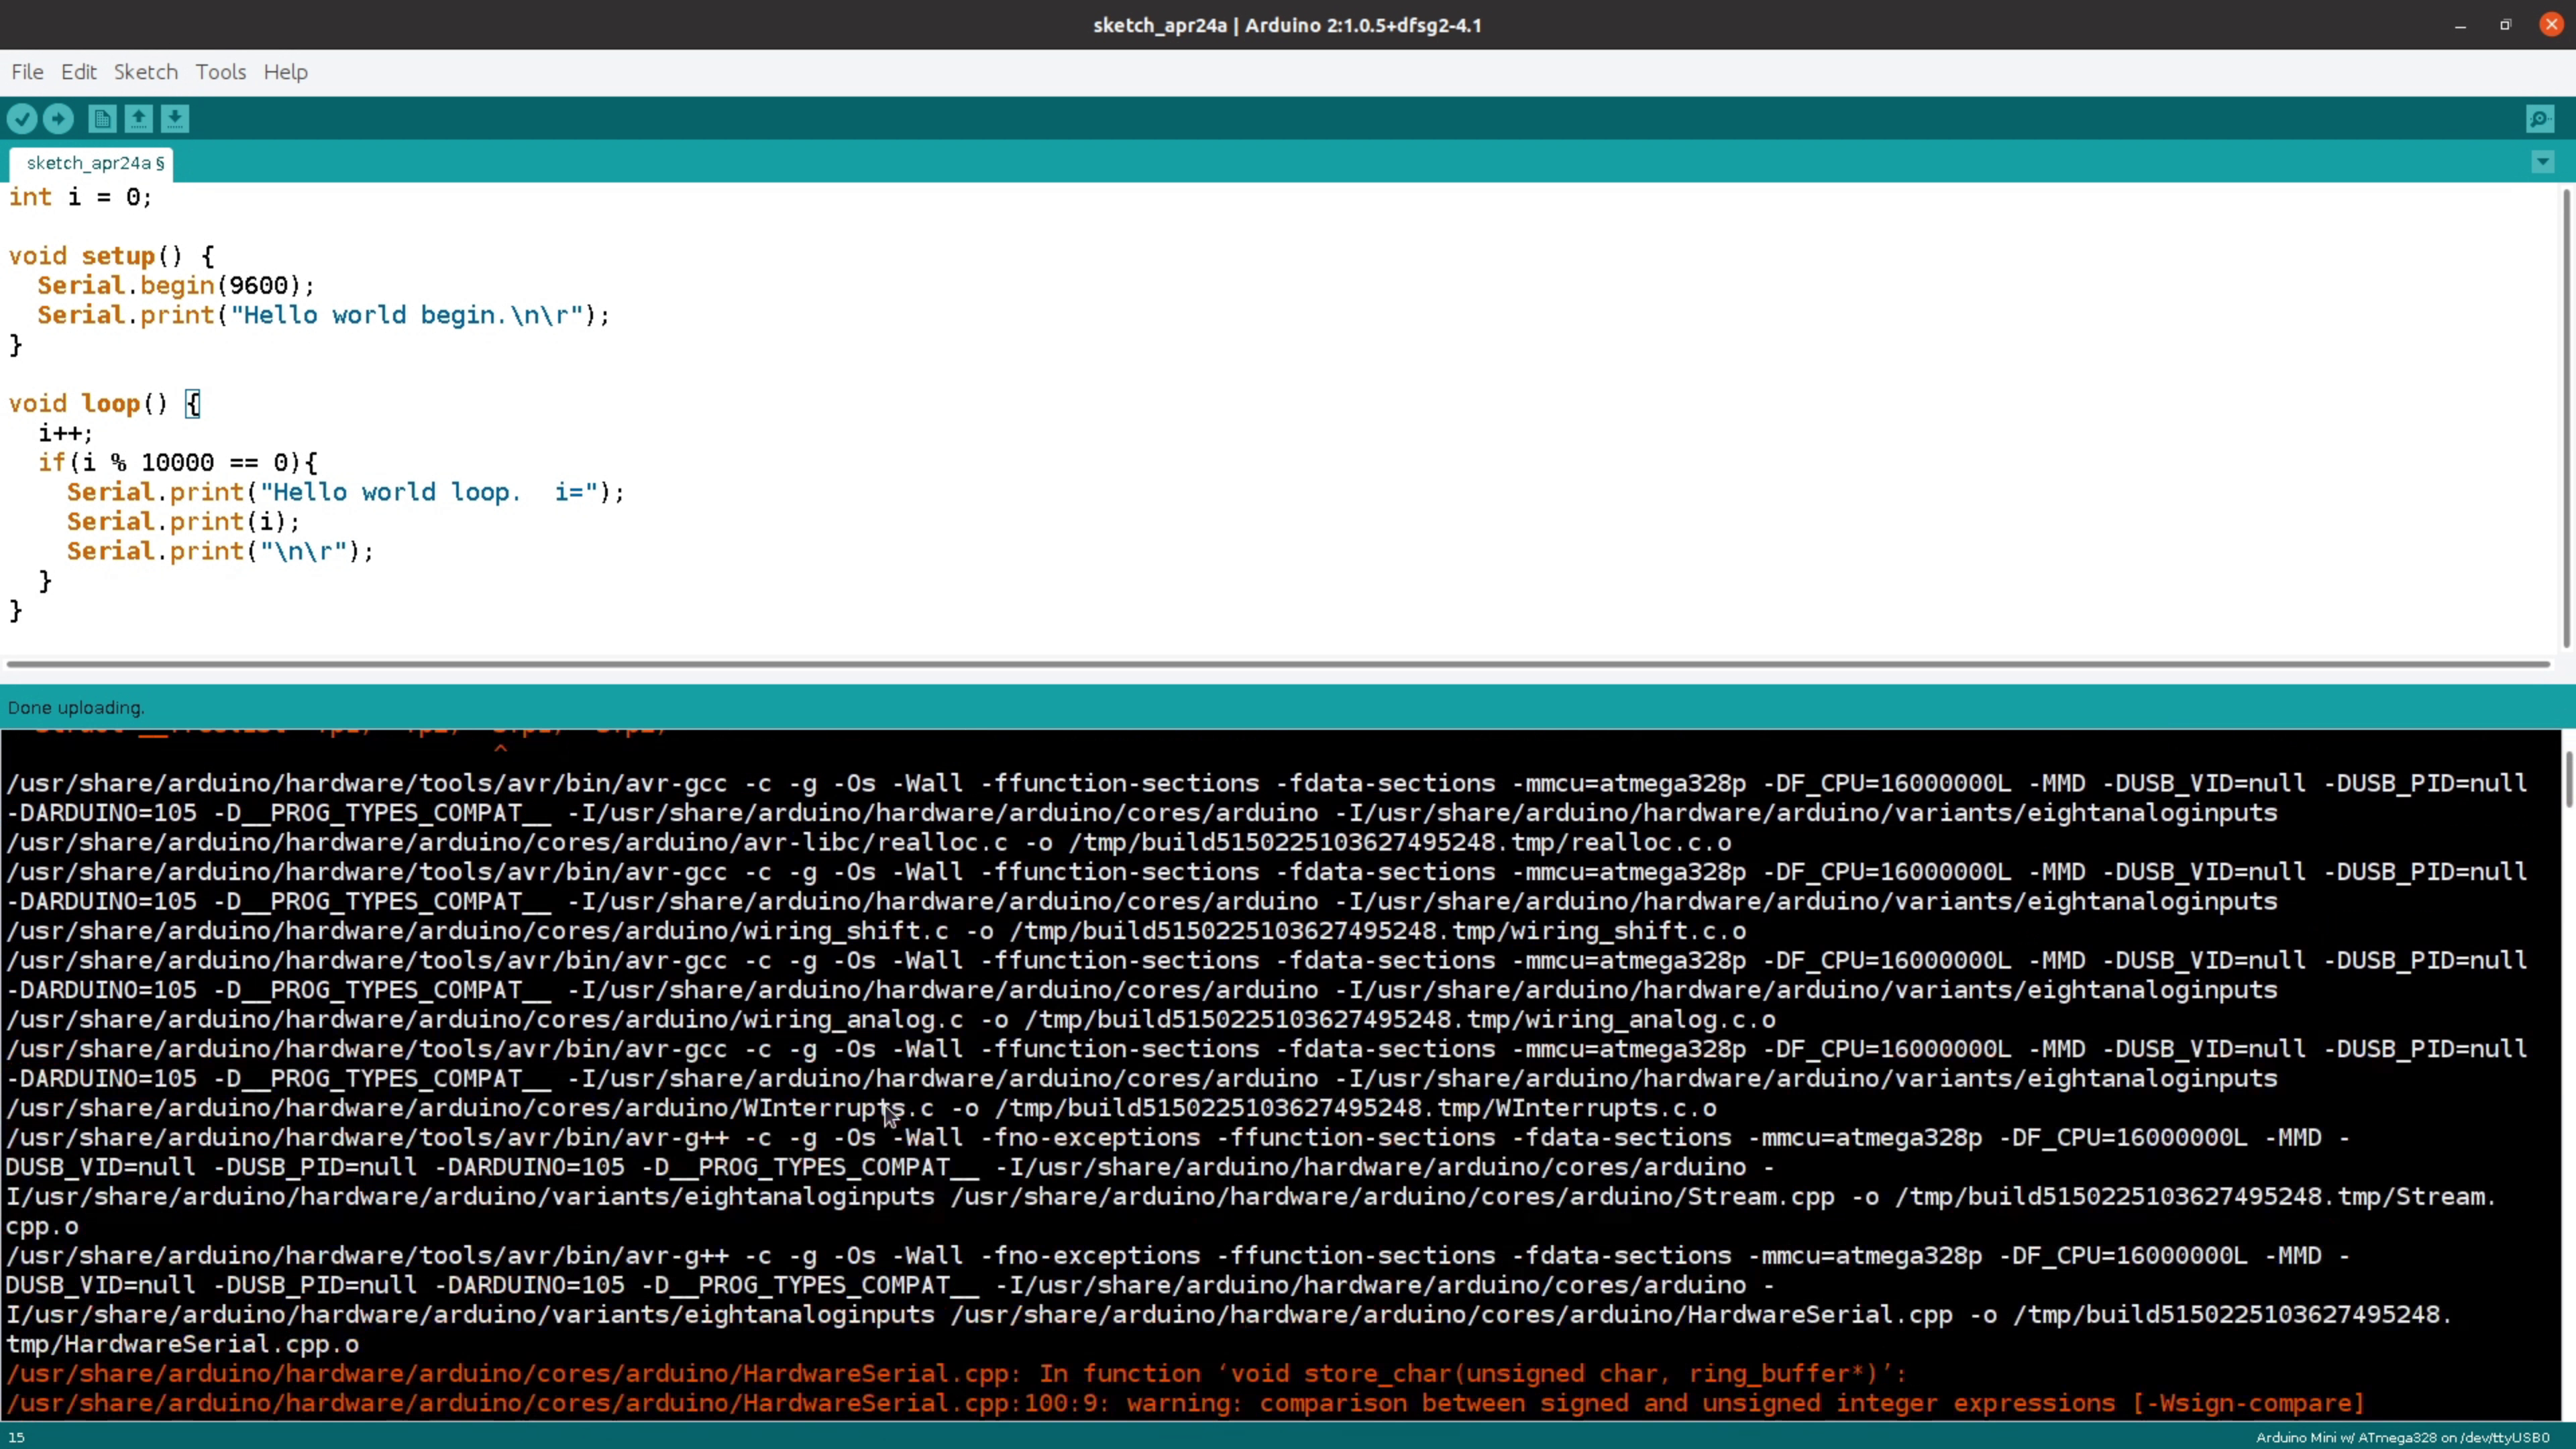
Then, after building the program once in the Arduino IDE, the build output was copy-pasted into an empty script file:
Then, I added the following shell script variable declarations:
AVR_BIN=/usr/share/arduino/hardware/tools/avr/bin
AVR_HARDWARE=/usr/share/arduino/hardware/arduino
GPP_FLAGS="-c -g -Os -Wall -fno-exceptions -ffunction-sections -fdata-sections -mmcu=atmega328p -DF_CPU=16000000L -MMD -DUSB_VID=null -DUSB_PID=null -DARDUINO=105 -D__PROG_TYPES_COMPAT__ -Inull/cores/arduino -Inull/variants/eightanaloginputs"
GCC_FLAGS="-c -g -Os -Wall -ffunction-sections -fdata-sections -mmcu=atmega328p -DF_CPU=16000000L -MMD -DUSB_VID=null -DUSB_PID=null -DARDUINO=105 -D__PROG_TYPES_COMPAT__ -Inull/cores/arduino -Inull/variants/eightanaloginputs"
SKETCH_NAME=sketch_apr24a
Next, I used the following vim regular expressions to get rid of much of the text that was repeated many times. You may need to adjust some of these statements because they will be slightly different in your project:
%s/\/tmp\/build5150225103627495248.tmp\///gc
%s/\/usr\/share\/arduino\/hardware\/tools\/avr\/bin/null/gc
%s/\/usr\/share\/arduino\/hardware\/arduino/null/gc

%s/-c -g -Os -Wall -fno-exceptions -ffunction-sections -fdata-sections -mmcu=atmega328p -DF_CPU=16000000L -MMD -DUSB_VID=null -DUSB_PID=null -DARDUINO=105 -D__PROG_TYPES_COMPAT__ -I${AVR_HARDWARE}\/cores\/arduino -I${AVR_HARDWARE}\/variants\/eightanaloginputs/null/gc

%s/-c -g -Os -Wall -ffunction-sections -fdata-sections -mmcu=atmega328p -DF_CPU=16000000L -MMD -DUSB_VID=null -DUSB_PID=null -DARDUINO=105 -D__PROG_TYPES_COMPAT__ -I${AVR_HARDWARE}\/cores\/arduino -I${AVR_HARDWARE}\/variants\/eightanaloginputs/null/gc

%s/sketch_apr24a/null/gc
This process substantially cleans up the script and makes it more readable. I also modified an absolute path that was provided to one of the '-L' flags to use './' (the current directory) instead of an absolute path. The result was a shell script that could do the same compiling and flashing that the Arduino IDE would do.
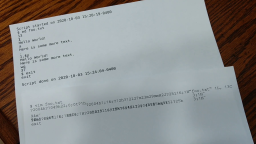
Then, I used the following command to connect to my Arduino and monitor its serial output.
minicom -D /dev/ttyUSB0 -b 9600
Optional Arduino Library Includes & Makefile
For supporting other Arduino libraries in the make file (such as '#include <Stepper.h>'), I use the following method:
# Locate the Stepper.h
find /usr/share/arduino/ -name 'Stepper.h'
/usr/share/arduino/libraries/Stepper/Stepper.h
Then, add an extra -I compiler flag for GPP_FLAGS:
-I/usr/share/arduino/libraries/Stepper
Then, find the location of the .cpp file for stepper:
find /usr/share/arduino/ -name Stepper.cpp
/usr/share/arduino/libraries/Stepper/Stepper.cpp
And add another make file rule for this stepper library:
Stepper.o: /usr/share/arduino/libraries/Stepper/Stepper.cpp
         $(ARDUINO_CPP) $(GPP_FLAGS) $< -o $@
Finally, a reference to Stepper.o will need to be added to the dependencies for the linker, and to explicitly add it to core.a (see video for details). At this point, the shell script provides a fairly concise listing of all required building and flashing commands. I then modified this script to get the Makefile that was shown at the start of this article.
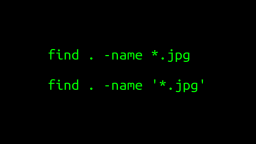 A Surprisingly Common Mistake Involving Wildcards & The Find Command
Published 2020-01-21 |
 Buy Now -> |
 A Guide to Recording 660FPS Video On A $6 Raspberry Pi Camera
Published 2019-08-01 |
 The Most Confusing Grep Mistakes I've Ever Made
Published 2020-11-02 |
 Use The 'tail' Command To Monitor Everything
Published 2021-04-08 |
 An Overview of How to Do Everything with Raspberry Pi Cameras
Published 2019-05-28 |
 An Introduction To Data Science On The Linux Command Line
Published 2019-10-16 |
 Using A Piece Of Paper As A Display Terminal - ed Vs. vim
Published 2020-10-05 |
| Join My Mailing List Privacy Policy |
Why Bother Subscribing?
|