A Guide to Recording 660FPS Video On A $6 Raspberry Pi Camera
2019-08-01 - By Robert Elder
This article will discuss the setup steps that are required for recording videos at high frame rates on cheap Raspberry Pi cameras. Frame rates up to 660FPS on the V1 camera and up to 1007 on the V2 camera can be achieved. Filming at these extremely high frame rates on a Raspberry Pi is much more challenging and involves more work than typical point and shoot photography. This article was primarily written to supplement the instructions in the following video:
The instructions presented here were tested to work on a fresh Raspbian OS image with the following md5 hash:
md5sum ~/Downloads/2019-07-10-raspbian-buster-lite.img
921052ef30538b995933078e8779c585  ~/Downloads/2019-07-10-raspbian-buster-lite.img
Furthermore, the version of Raspberry Pi that was tested was a Raspberry Pi 3 model B. During the initial setup process, a Raspberry Pi V2 camera was plugged into the Raspberry Pi. After the install was completed, the camera was switched to a V1 camera which also worked without further steps, so the install steps here should cover bother camera types. The V1 camera that was tested uses the OV5647 image sensor, and the V2 camera tested uses the IMX219 sensor.
Update March 5, 2020
The instructions I provide below make reference to static forks of the relevant code so that the results described here are repeatable. You should check out the original 'raspiraw' and 'dcraw' branches for updates by 6by9:
and Hermann-SW
These branches are likely to contain updates that you may need to support the Raspberry Pi 4, or more recent camera models. Several people have reported seeing this error:
Failed: don't know how to set GPIO for this board!
and the solution can likely be found in newer updates from the branches listed above.
Process Overview
The general process for creating high-speed videos consists of the following:
- 1) Use a fork of 'raspiraw' to capture headerless RAW image frames and timestamp metadata at ~660FPS directly into RAM.
- 2) As a post-processing step, concatenate a RAW image header onto all captured RAW frames.
- 3) Use a fork of dcraw to turn the RAW image frames into .tiff files.
- 4) Use ffmpeg along with the captured frame timestamp metadata to turn the image sequence into a video.
The major limitation throughout this process is the speed at which memory can be copied and transmitted. Only 20-40 seconds of video can be recorded at a time due the memory exhaustion of the Raspberry Pi. Also limited is the resolution of the recording: On the $6 camera, a maximum of 640x64 resolution can be recorded due to limitations on memory bandwidth.
Setup
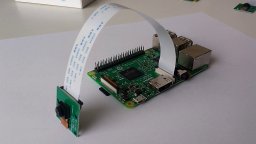
First, make sure your camera is already installed and works correctly for recording normally at lower frame rates using raspivid and raspistill. See the article An Overview of How to Do Everything with Raspberry Pi Cameras for details.
Then, install the following packages that are required by dcraw:
sudo apt-get install libjasper-dev libjpeg8-dev liblcms2-dev # required for dcraw.
sudo apt-get install ffmpeg
sudo apt-get install git
Then, clone and build the required repositories for dcraw and raspiraw. The github URLs below are convenient unmodified forks of the original repos which can be found in links elsewhere in this article. The commit hashes specified below are the exact ones that this process was tested on:
cd ~/
git clone https://github.com/RobertElderSoftware/fork-raspiraw && cd fork-raspiraw && git checkout 18fac55136f98960ccd4dcfff95112134e5e45db
./buildme
cd ~/
git clone https://github.com/RobertElderSoftware/dcraw && cd dcraw && git checkout 8d2bcbe8f9d280a5db8da30af9b6eb034f7f2859
./buildme
During the building of dcraw, the following warning message was observed. It was found that this message could be safely ignored:
/usr/bin/ld: warning: libjpeg.so.62, needed by /usr/lib/gcc/arm-linux-gnueabihf/6/../../../arm-linux-gnueabihf/libjasper.so, may conflict with libjpeg.so.8
Now, install these dependencies of 'raspiraw':
sudo apt-get install wiringpi
sudo apt-get install i2c-tools
Append the following inside the file '/boot/config.txt':
dtparam=i2c_vc=on
Append the following inside the file '/etc/modules-load.d/modules.conf':
i2c-dev
Now reboot in order for the changes to take effect:
sudo reboot now
Recording A Video
The steps below will show the process for creating a simple 1 second slow-motion video with a 50x slowdown at a resolution of 640x64. First, enable the I2C connection with the Camera:
cd ~/fork-raspiraw
./camera_i2c
Now, run this command to capture 1 second worth of RAW images frames into RAM at 660 FPS:
./raspiraw -md 7 -t 1000 -ts /dev/shm/tstamps.csv -hd0 /dev/shm/hd0.32k -h 64 -w 640 --vinc 1F --fps 660 -sr 1 -o /dev/shm/out.%06d.raw
This command will concatenate the single image frame we saved onto all of the individual image frames:
ls /dev/shm/*.raw | while read i; do cat /dev/shm/hd0.32k "$i" > "$i".all; done # add headers
Now, run this command to use dcraw to convert each RAW image frame into a .tiff file that ffmpeg can work with:
ls /dev/shm/*.all | while read i; do ~/dcraw/dcraw -f -o 1 -v -6 -T -q 3 -W "$i"; done # Convert to .tiff
Run this command to output and create a python script that will parse the frame timestamp data into a file that will help ffmpeg display frames at the correct position. Note that this is a multi-line shell command (you need to copy and paste the entire thing at once):
cat << EOF > /dev/shm/make_concat.py
# Use TS information:
import csv

slowdownx = float(50)
last_microsecond = 0
with open('/dev/shm/tstamps.csv') as csv_file:
  csv_reader = csv.reader(csv_file, delimiter=',')
  line_count = 0
  for row in csv_reader:
    current_microsecond = int(row[2])
    if line_count > 0:
      print("file '/dev/shm/out.%06d.raw.tiff'\nduration %08f" % (int(row[1]), slowdownx * float(current_microsecond - last_microsecond) / float(1000000)))
    line_count += 1
    last_microsecond = current_microsecond
EOF
Run the timestamp processing script:
python /dev/shm/make_concat.py > /dev/shm/ffmpeg_concats.txt
Now run ffmpeg to create the final output:
ffmpeg -f concat -safe 0 -i /dev/shm/ffmpeg_concats.txt -vcodec libx265 -x265-params lossless -crf 0 -b:v 1M -pix_fmt yuv420p -vf "pad=ceil(iw/2)*2:ceil(ih/2)*2" /dev/shm/output.mp4
The final output video is now located at '/dev/shm/output.mp4'.
Examples
Notes And Caveats
The first video you film is most likely going to come out looking black. This is because extremely high frame rate photography can only expose the sensor to light for a very short amount of time before the sensor needs to reset and record the next frame. Thus, you should try pointing the sensor directly at a bright light source to get an idea of how bright your exposures need to be. Filming at these high frame rates is not like regular point and shoot photography. You'll need to be a lot more strategic in how you set up your scenes and record them. Things like getting the exposure and lighting conditions right are critical.
The commands above don't clear out the contents of '/dev/shm' after each recording, so you should take care to modify the steps above to prevent things like the 'ls *.all' command from using frames from a previous recording when the recording times are different. Also, note that '/dev/shm' is often used to store temporary files by other processes, so take care when deleting/overwriting things in this folder.
As noted above, there are many limitations around memory when recording at these extremely high frame rates. The default size of /dev/shm is only large enough to record 20-40 seconds of video (depending on the resolution and camera version). The size of /dev/shm can be increased by a few hundred megabytes without issue, however this only gives on the order of a 25% increase in the max recording time. Frame can be written to flash memory instead of RAM, however this will affect the frame rate. You can always request whatever frame rate you want, upon inspecting the timestamps.csv file, you'll note that the actual timestamps of each frame won't be consistent with the frame rate you requested if the Raspberry Pi isn't able to keep up.
Update 2019-08-19
In an effort to make the process of recording videos easier, I have done a bit of work on a small client/server app that currently allows you to easily request a recording and download the results into a .tar file from the Pi, all in one command. This is useful since one recording session will usually completely fill up the entire memory of the Pi and prevent you from doing another until you save the results out of memory to somewhere else. The post-processing is also much faster on a desktop/laptop computer, so it's usually a good idea just to download the raw image data and save it so you can re-process it later.
I've decided to name the repository PatientTurtle so that it's easy to Google for. This app isn't very impressive at the moment, but if there is interest in it, perhaps I'll invest more time later.
Further Reading
 An Overview of How to Do Everything with Raspberry Pi Cameras
Published 2019-05-28 |
 Buy Now -> |
 Using SSH to Connect to Your Raspberry Pi Over The Internet
Published 2019-04-22 |
 DS18B20 Raspberry Pi Setup - What's The Deal With That Pullup Resistor?
Published 2019-06-12 |
 A Beginners Guide to Securing A Raspberry Pi
Published 2019-04-22 |
 Using SSH and Raspberry Pi for Self-Hosted Backups
Published 2019-04-22 |
 Pump Room Leak & Temperature Monitoring With Raspberry Pi
Published 2019-06-20 |
 A Surprisingly Common Mistake Involving Wildcards & The Find Command
Published 2020-01-21 |
| Join My Mailing List Privacy Policy |
Why Bother Subscribing?
|